Third Party Installation - Commercial Commissioning Form

Introduction


Complete this form on site to finalise commissioning for this charger. This activates the warranty and allows the charger to be managed in the Site Management Service and viewed by drivers in the Pod Point app.

WITHOUT THIS INFORMATION, MAINTENANCE VISITS CANNOT BE PROVIDED AND THE CHARGER CANNOT BE SUPPORTED IN-LIFE 

Ensure that you complete this form on site - it uses your phone's location to capture the latitude and longitude of the charger.  Also ensure that your location settings are turned on for your web browser on your mobile device.

If you have any issues during this process, please contact Pod Technician Support for remote assistance - call us on 0207 247 4114 , Option 4 then Option 2.

Engineer Details


Installation Details
These are the details of the end client Site Administrator. This contact will be invited to use the Site Management Service to administer their part of the Pod Point network and will receive any revenue made from tariffs on the chargers and be responsible for paying ongoing subscription fees.


Site Latitude & Longitude can be found on: https://www.latlong.net/


Router Information


Rp


Unit Configuration and Functionality testing

Unit configuration and functionality testing

You must use the Pod Point Installer app to configure charger models purchased from 2025 onwards - download from the Apple app store or Android play store

For older models, each socket requires unit configuration as the default setting is rated at 10 amps.

This must be done individually for each charging socket by;

1. Connecting your phone or device to the individual sockets Wi-Fi broadcast “podpoint”
wifi

2. Open the Access Portal browser http://192.168.101.1/

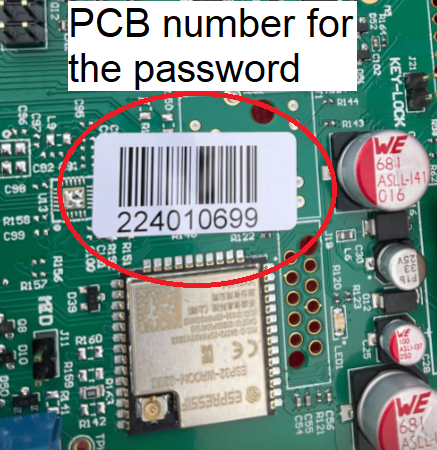
3. Press the cog in the top right corner and enter the PCB serial number as the device password.
cog

4. Configure the power rating and any additional settings if required

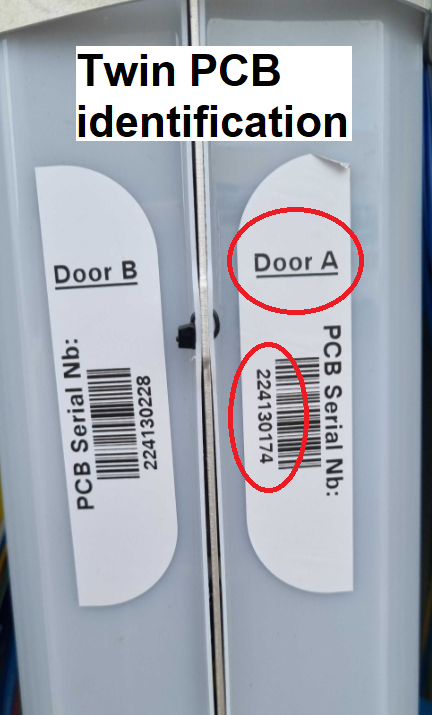
Note - If you have multiple sockets, individually turn on each socket separately to do the unit configuration set-up.

Watch our YouTube Video guide to learn more - https://youtu.be/o0Aky7OmNfA

Once all the Charging Point Sockets are correctly configured you must conduct a functionality test.

1. Insert simulator Gun with an appropriate load connected e.g., heater, battery charger, etc
2. Select Pilot State C - Charging
3. Leave for 2 minutes on charge 

If you have any issues during this process, please contact Pod Technician Support for remote assistance - call us on 0207 247 4114 , Option 4 then Option 2.
Installed chargers information - AC units

1st Charger Details


2nd Charger Details


3rd Charger Details


4th Charger Details


5th Charger Details


6th Charger Details


7th Charger Details


8th Charger Details


9th Charger Details


10th Charger Details


11th Charger Details


12th Charger Details


13th Charger Details


14th Charger Details


15th Charger Details


Summary